Webforms are used to collect information from users. They can be used to submit requests for information, register users for events, or submit documents to offices or programs.
Webforms on the the School of Medicine Drupal Federation are NOT designed for the collection of PHI, credit card information, social security numbers, or other types of sensitive data that requires a security encryption key!
DHTS requires that all webforms employ reCaptcha to reduce spam. Apply reCaptcha as a webform element
The site administrator creates the webform and then content editors can add it to a basic page via a paragraph.
Steps to creating a webform
- Create the Webform
- Add webform elements
- Set-up submission routing
- Apply the webform paragraph to page

Create a webform
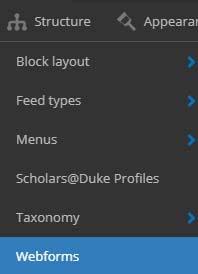
- In edit mode, select Structure > Webform from the top navigation
- Select the Add webform button
- Title the webform. This title will not be visible when the webform is applied. Make sure each webform has a unique title. If you have more than one contact form on the site, use the name of the section, Contact Division A, Contact Program B, etc.
- Add an Administrative description if desired. This will only be visible by site administrators
- Add a Category if desired.
- Select Other and then type in the name of the category. Example: If an unit or a program has multiple forms, categorize by the unit or program name.
- Save
Webform menu
- View: shows the webform as the user will see it.
- Test: The system will randomly populate the fields so that builders can send test submissions to check for errors
- Results: View a list of the results and individual submissions
- Build: to build or edit a webform or it's elements
- Settings: open/close form, create custom confirmation letters, set up submission email instructions, etc.
It can be very useful to toggle between the view and the build tab to see what the form looks like as it is being built.
