Every page on a site must be assigned a parent item and added to a menu. If it is desired that a page not show in a menu, site administrators can hide the menu link titles after the first time the page is saved.
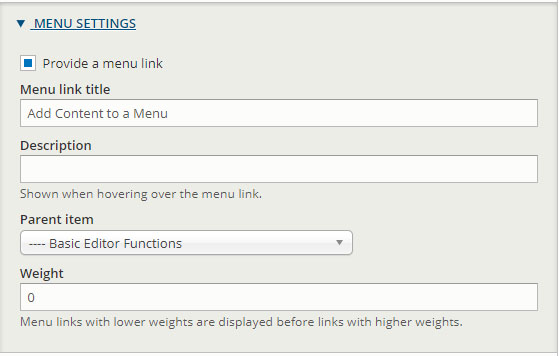
- In edit mode on a content type (page), look for the Menu Settings box on the far right of the page.
- Select the Provide a menu link box.
- Edit the automatically generated Menu link title field if necessary. For instance, change "About the Office of X" to "About Us."
- Select the Parent item dropdown menu, the page to which the current page should be attached.
- Example: If the Leadership, Faculty and Facility pages are all in the About Us section of the website, then About Us should be the parent item for each of these pages.
- About Us
- Leadership
- Faculty
- Facility
- About Us
- Set an optional Weight value to set the sort order in the menu for the page.
- Save.
A note about weight: The default order of a menu is that the first item created is the first item in the menu, the second item is second and so on. In general the default weight is 0.
The order of a menu can be adjusted by changing the weight of each page. The lowest (negative) number is first item in a menu and the highest (positive) number is last. Often, starting at zero makes ordering the menu easier than using negative numbers. If content editors are adding content from an established sitemap, setting the weight of the page when it's created can ensure that pages are listed in the correct order, regardless of the order in which they were created. A good idea is to leave 5 or 6 places between pages in case later content needs to be inserted between two existing pages.
The order of a menu can often be rearranged by the site administrator in the Main Navigation tab, regardless of weight or the initial order.
Menu Settings Box