Documents must be ADA compliant prior to being uploaded to the site
Videos must have closed captions prior to being embedded on the site
Audio files must have a written transcript on the page or linked from the page where the file is embedded.
Add images, documents, audio and video embeds
The Drupal Media Library is a robust tool used to upload and organize documents, images, and audio and video links to embed on pages. Media is managed in a central searchable location making it easy to find and reuse content where appropriate.
There are two ways to upload content to the Media Library, via the Media tab, or as needed with the "Insert from Media Library" icon on the WYSIWYG editor toolbar.
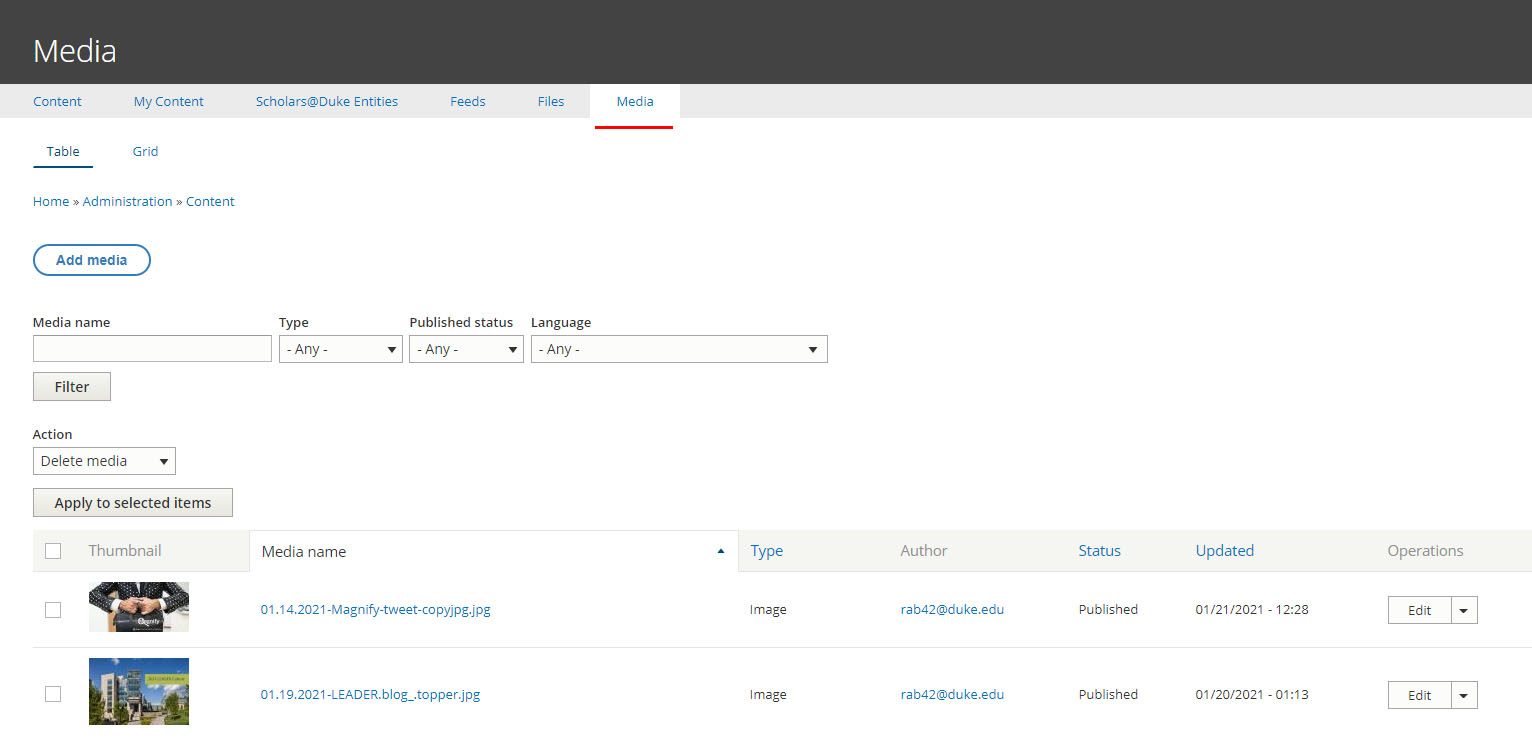
Media Tab
The Media tab is found via Content > Media in edit mode. The Media tab is the easiest way to upload multiple media items to make them available for later use.
To insert from Media Library icon on the WYSIWYG editor toolbar, see Add Media to Page in the appropriate media section.
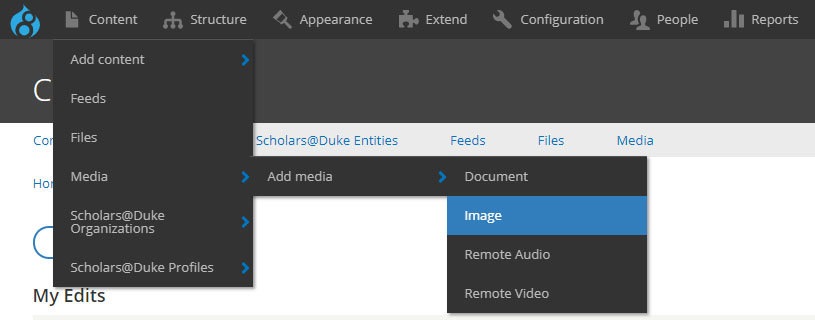
Add Content to Media Library
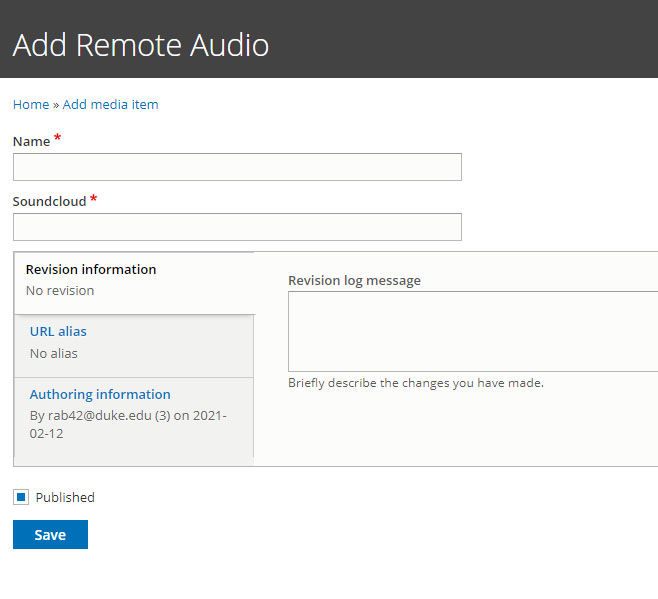
Remote audio can be added from SoundCloud or WarpWire. Add warpwire audio files like you would a video.
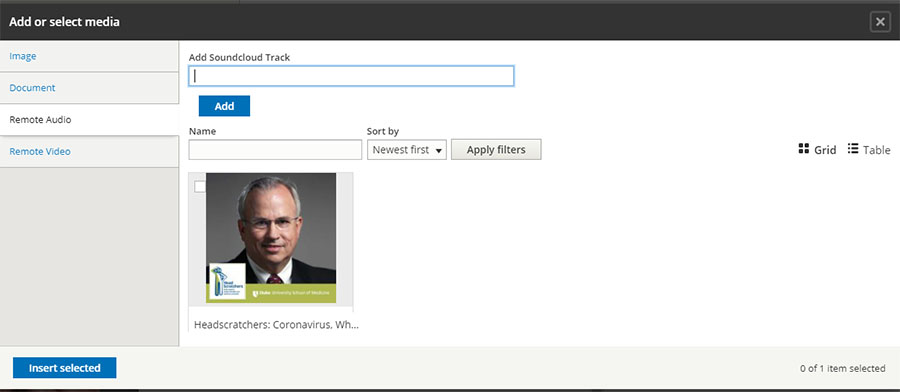
- Select Content > Media > Add Media
- Select Remote Audio
- Name - Title of the podcast or audio file
- SoundCloud - Paste the URL of the audio file
- Save
- Repeat as necessary until finished
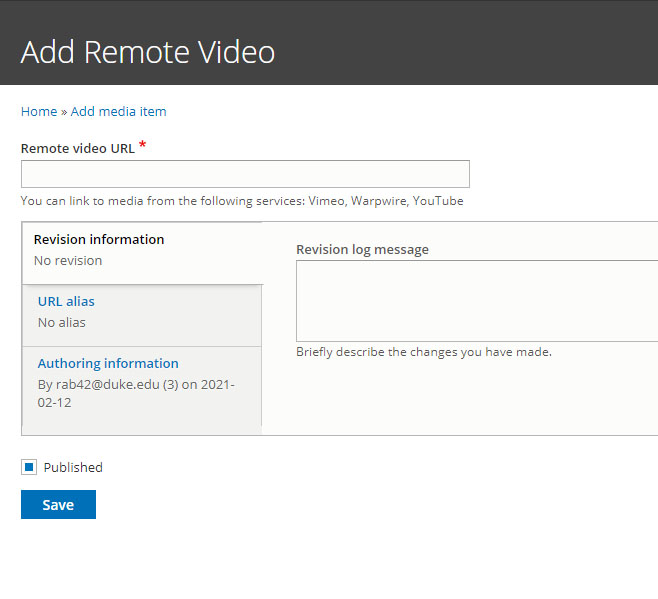
In order to ensure compliance with the Americans with Disabilities Act (ADA), all video files must be closed captioned. See: Duke University recommended captioning & transcription services
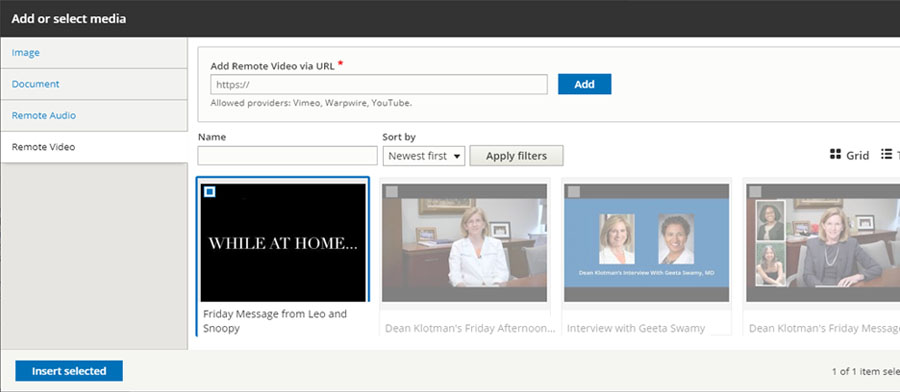
- Select Content > Media > Add Media
- Select Remote video
- Remote Video URL - paste the video URL
- Save
- Repeat as necessary until finished.
Add Media to Page
In order to ensure compliance with the Americans with Disabilities Act (ADA), all audio files must have a written transcript that is either on the same page as the embedded file or linked from that page. See: Duke University recommended captioning & transcription services
- Select the Insert from Media icon from the WYSIWYG editor toolbar
- Select audio from the Add or Select Media Menu
- Add the SoundCloud URL or
- Check the checkbox in the top left corner of the audio file to be embedded
- Select Insert Selected
- Save
- Select the Edit Media button
- Select desired alignment and add caption if desired
- Save
- Select the Insert from Media icon from the WYSIWYG editor toolbar
- Select video from the Add or Select Media Menu
- Add the video URL or
- Check the checkbox in the top left corner of the video file to be embedded
- Select Insert Selected
- Save
- Select the Edit Media button
- Select desired alignment and add caption if desired
- Save
The Media Library allows editors to add, search, edit and delete media for the site.
By selecting the edit button, users can edit alt text and move the placement of the crosshairs if they're not optimal.