There are a number of options for what happens when a webform is submitted.
- Nothing - the submissions are cataloged on the site and administrators can view and download submissions when desired.
- Submissions are emailed to someone - this includes the person who submitted the form as well as the person who manages the submissions
- Confirmation messages are posted to the Website or emailed to the submitter.
View submissions
- Select Structure > Webforms in the top admin menu.
- Find the desired form in the table, click the down arrow under the Operations column to expand the menu and click Results.
- View the submissions on the page.
Download submissions
- Select Structure > Webforms in the top admin menu.
- Find the desired form in the table, click the down arrow 🢓 under the Operations column to expand the menu and click Results.
- Select the Download tab item near the top of the page and set parameters (the default parameters are usually best).
- Click the Download button at the bottom of the page.
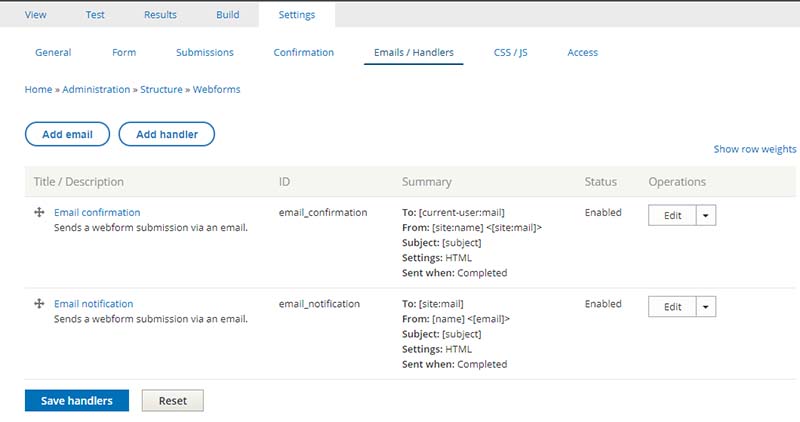
To set up the submission email function, select Build to edit a particular webform, then >Settings>Emails/Handlers from the webform menu
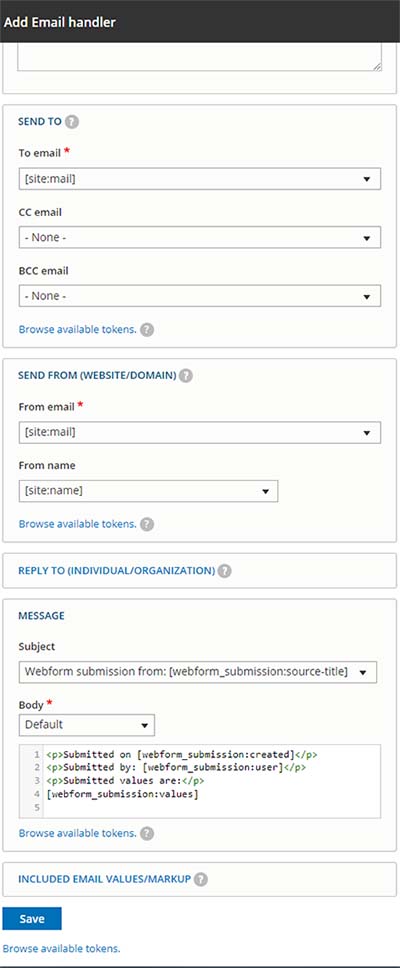
- Select the Add email button
- Title the email. Example: Submission email, confirmation email, etc.
- Complete the fields in the SEND TO box. Emails can be sent to custom email addresses (someone who manages registrations, etc. ) or to an email address submitted on the form.
- Complete the SEND FROM box. This could be the office or program or the person who submitted the email.
- Complete REPLY TO box. If someone replies to this email, where should it go?
- In the MESSAGE box, confirm the Subject line. This can remain the default message "Webform Submission Form (name of form) or it or can be customized.
- Save
- Repeat as necessary
When setup is complete, review your setup and test the form.
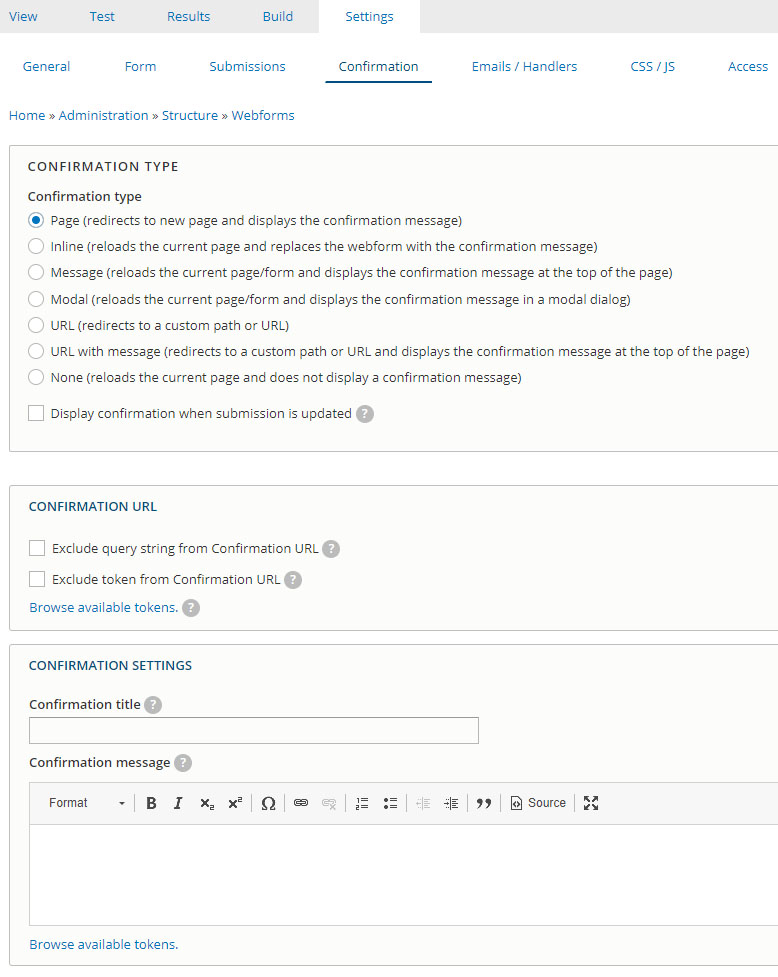
Select Build on the webform in question and then Setting in the webform menu
- Select the Confirmation Tab
- Select the type of confirmation desired in the CONFIRMATION TYPE box.
- Write your confirmation message in the confirmation settings box.
- Save
Test the webform to verify the confirmation is correct.