Documents must be ADA compliant prior to being uploaded to the site
Videos must have closed captions prior to being embedded on the site
Audio files must have a written transcript on the page or linked from the page where the file is embedded.
Add images, documents, audio and video embeds
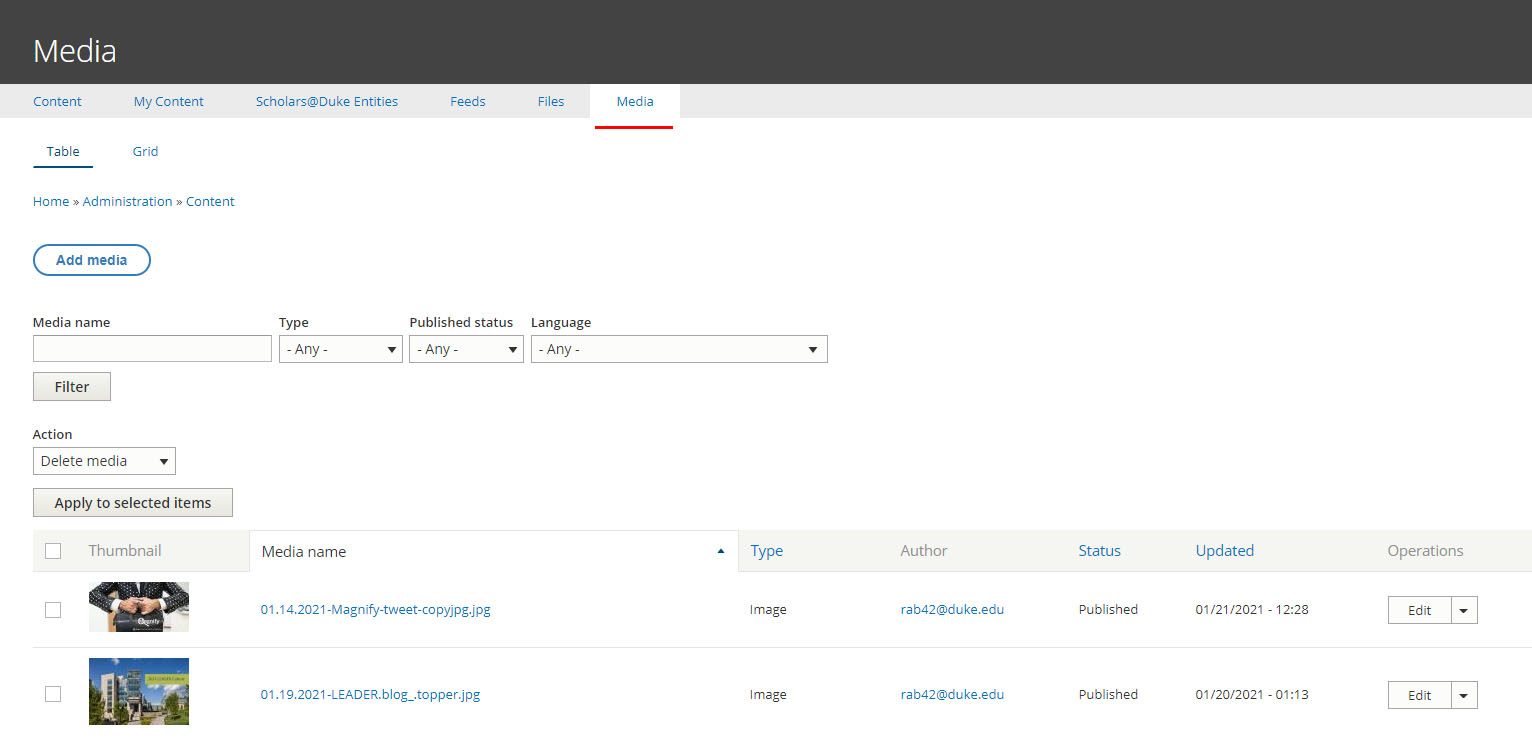
The Drupal Media Library is a robust tool used to upload and organize documents, images, and audio and video links to embed on pages. Media is managed in a central searchable location making it easy to find and reuse content where appropriate.
There are two ways to upload content to the Media Library, via the Media tab, or as needed with the "Insert from Media Library" icon on the WYSIWYG editor toolbar.
Note: currently, there isn't a way to resize images once they're uploaded. Some images will be automatically resized to fit the dimensions of the content or paragraph type, blogs, personnel, icon rows, text + image, etc. The minimal image size for each content type will be in the instructions for that content type, and eventually, displayed by the Add Media button on the page in question. Should this functionality become available at a future date, it will be added to the system.
Media Tab
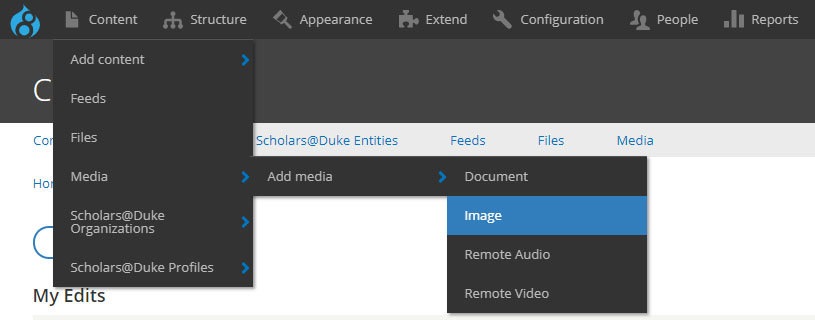
The Media tab is found via Content > Media in edit mode. The Media tab is the easiest way to upload multiple media items to make them available for later use.
To insert from Media Library icon on the WYSIWYG editor toolbar, see Add Media to Page accordion section below
Add Content to Media Library
- Select Content > Media > Add Media
- Select Image
- Name - name the image something memorable to help searchability. It does not need to be the same name as the file name
- Select Choose File, find the file to upload from the computer
- Ensure the crosshairs on the preview of the image are over the most important part of the image. If the image is a portrait, ensure that the crosshairs are on the bridge of the nose to.
- Add Alt Text - a brief description of the image for adaptive readers. If the image is just a 'decoration' or not relevant to the content on the page, you can use " " as the alt text. i.e. a graphic separator, etc.
- Ensure the "publish" box is checked
- Save
- Repeat as necessary until finished.
Images cannot be resized once they are uploaded to the Media Library. Larger images can be inserted into various paragraph types, Icon rows, Sidebar Callouts, Feature images, etc., and the styling will adjust the image as necessary. However, images inserted into the Full Content (text) editor will need to be appropriately sized prior to uploading.
Documents must be ADA compliant before being uploaded to the site.
- Select Content > Media > Add Media
- Select Document
- Name - Use the title of the document, not the file name, as it will appear on the page.
- Select Choose File and find the document to upload from the computer (.txt .doc .docx .pdf)
- Ensure the "publish" box is checked
- Save
- Repeat as necessary until finished.
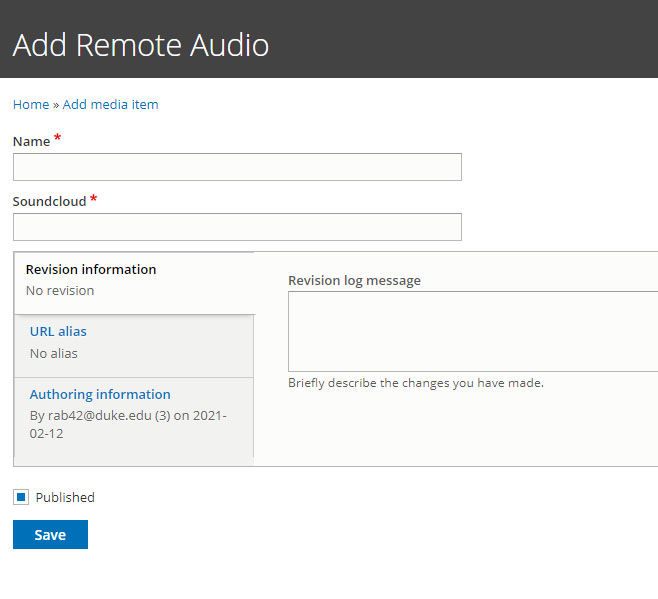
- Select Content > Media > Add Media
- Select Remote Audio
- Name - Title of the podcast or audio file
- SoundCloud - Paste the URL of the audio file
- Save
- Repeat as necessary until finished
In order to ensure compliance with the Americans with Disabilities Act (ADA), all video files must be closed captioned. See: Duke University recommended captioning & transcription services
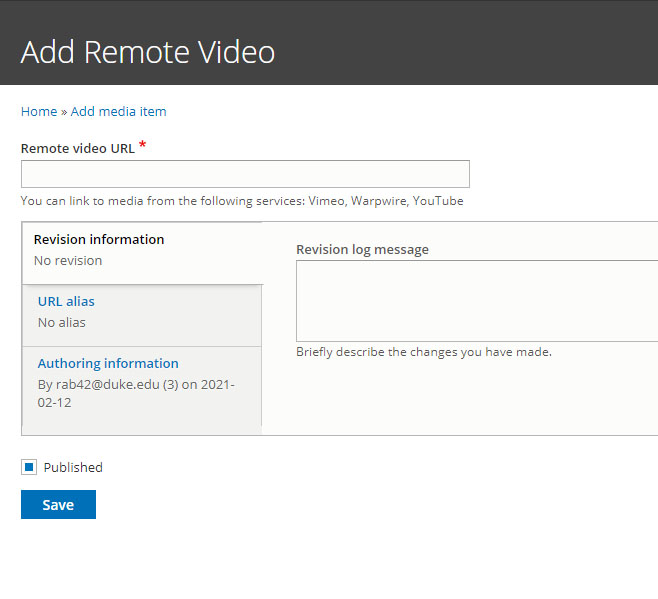
- Select Content > Media > Add Media
- Select Remote video
- Remote Video URL - paste the video URL
- Save
- Repeat as necessary until finished.
Add Media to Page
- Select the Insert from Media icon from the WYSIWYG editor toolbar
- Select Image from the Add or Select Media Menu
- Search for the name of the image in Name box
- Select the checkbox in the top left corner of the desired image
- Select Insert Selected to return to the page
- Select the "Edit Media" box
- Select the desired Align box
- Select Caption if desired
- Save
- Edit caption under the image
Documents are added and managed as as as media items by default. They can be hyperlinked to text or inserted as standalone media items.
Link a document from text on a page
- Select Content > Media
- Select the Document tab
- Use the Name field to search for the document to be added
- Select Edit
- Right click on the FILE NAME of the document and copy the hyperlink
- if desired, paste hyperlink in notebook or save it somewhere so it isn't lost.
- Select edit on the page where the hyperlink is to be placed
- Highlight the text to be hyperlinked
- Select the standard hyperlink icon
- Paste the copied hyperlink in the provided field
- DELETE EVERYTHING TO THE LEFT OF THE FIRST SLASH!!
- Example:
https://dhtsws-som-fedmod-documentation.ocp.dhe.duke.edu/sites/default/files/2021-02/Test.Word_.Document.docx
- Example:
- Save.
Test the hyperlink to ensure that it works properly.
Add document link to a page
- Select the Insert from Media Library Icon
- Select the Document tab
- Use the Name field to search for the document to be added
- Select the checkbox at the top left of the document box
- Select Insert
- Select the Edit Media button to align the document link;
- Save
In order to ensure compliance with the Americans with Disabilities Act (ADA), all audio files must have a written transcript that is either on the same page as the embedded file or linked from that page. See: Duke University recommended captioning & transcription services
- Select the Insert from Media icon from the WYSIWYG editor toolbar
- Select audio from the Add or Select Media Menu
- Add the SoundCloud URL or
- Check the checkbox in the top left corner of the audio file to be embedded
- Select Insert Selected
- Save
- Select the Edit Media button
- Select desired alignment and add caption if desired
- Save
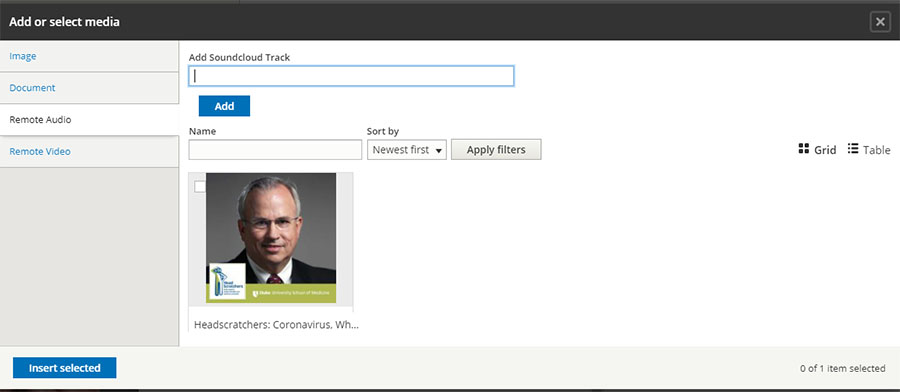
- Select the Insert from Media icon from the WYSIWYG editor toolbar
- Select video from the Add or Select Media Menu
- Add the video URL or
- Check the checkbox in the top left corner of the video file to be embedded
- Select Insert Selected
- Save
- Select the Edit Media button
- Select desired alignment and add caption if desired
- Save
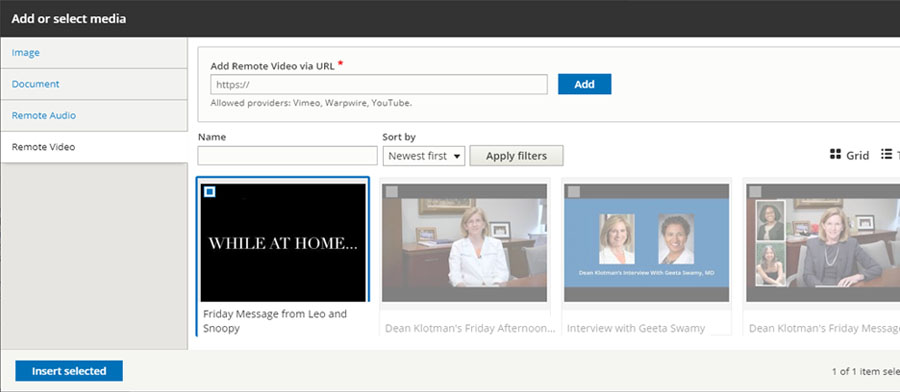
The Media Library allows editors to add, search, edit and delete media for the site.
By selecting the edit button, users can edit alt text and move the placement of the crosshairs if they're not optimal.